本文感谢 elasticsearch源码分析之plugin的开发 的精彩介绍,又梳理了其他相关内容。
以下讲述了基于maven构建的2.x版本es插件开发。重点讨论如何基于ActionFilter开发Filter类型的插件(同时拦截生效与Tcp,Http),同时简述了插件开发简单流程。
一、前言
1.1 什么是ES插件
elasticsearch拥有丰富的插件,而其灵活的插件开发机制让我们可以轻松的扩展我们自己想要的功能。
对于Elasticsearch的plugin可以分为两类:
jvm和site;其中site就是说要实现前端界面的,其他的都可以归纳到jvm这一类中。site:true表示发布为网站形式,_site目录下的内容将会起作用。jvm:true表示设置的classname对应的类将会被加载,对于依赖的资源,配置等信息也需要打包成jar。
1.2 插件调试与DEBUG
作者感觉debug过程确实比较痛,要发布打包,重启之类的操作。(下面马上讲一个稍微方便一些的开发插件方式)
更改
elasticsearch.yml添加path.plugins: /home/wangdi/{user_plugin_home}{user_plugin_home}可以直接设置成plugin的编译目录,这样打个包就直接能调试了。如果想同时调试多个插件,那么可以在
{user_plugin_home}创建多个软链接。
创建软链的命令
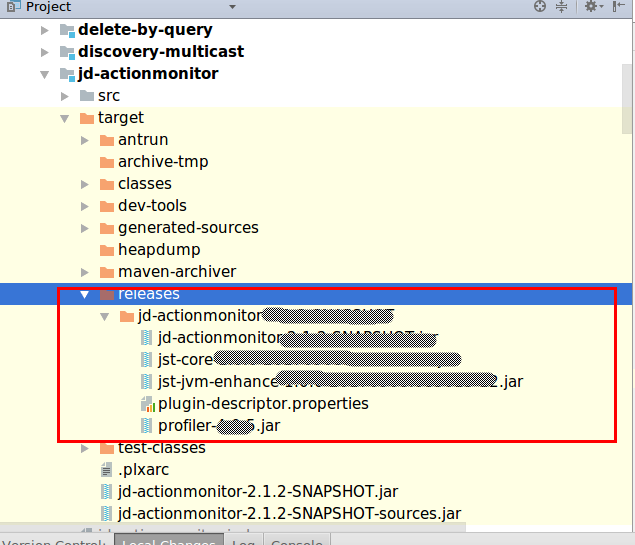
1 | $ ~/zjj-esplugins$ ln -s /home/wangdi/IdeaWorkspace/middleware/elasticsearch2.1.2/plugins/jd-actionmonitor/target/releases/jd-actionmonitor-2.1.2-SNAPSHOT monitor |
最终笔者
{user_plugin_home}目录如下
1 | $ ~/zjj-esplugins$ ls |
1.3 举两个自己开发的Plugin例子
相关源码demo可参见 es-plugin-demo
开发一个Rest类型的插件开发大概就是需要创建下面几个类。
1 | org.xxx.myplugin |
看一个继承BaseRestHandler实现的Service的例子(禁止删除,和黑名单禁止访问名,同时注册了一个rest服务hello)
注意:
controller.registerFilter只是拦截到了http类型的请求。
1 | public class MyService extends BaseRestHandler { |
而针对于拦截请求类型的插件开发就是把Service替成命名Filter就可以了(ActionFilter是拦截TransportAction,包含Http,Tcp)
1 | org.xxx.myplugin |
我们看一个自定义ActionFilter的例子。
1 | public class MyLogFilter implements ActionFilter { |
二、ES插件开发与es核心包插件模块源码分析
2.1 自定义插件模块结构
- 插件源码包
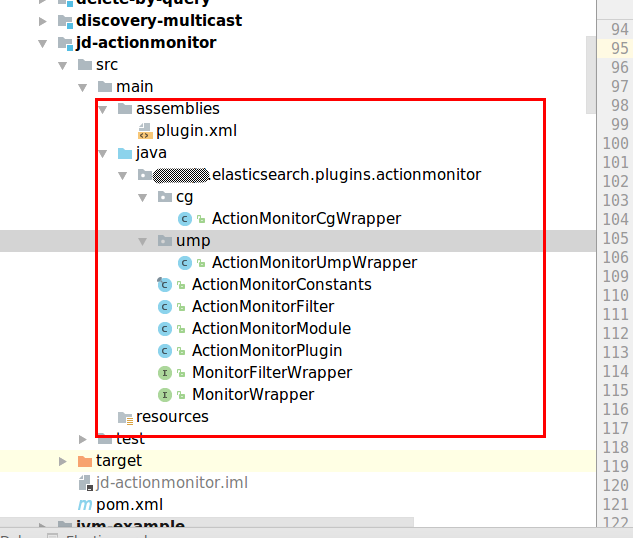
- 插件发行包
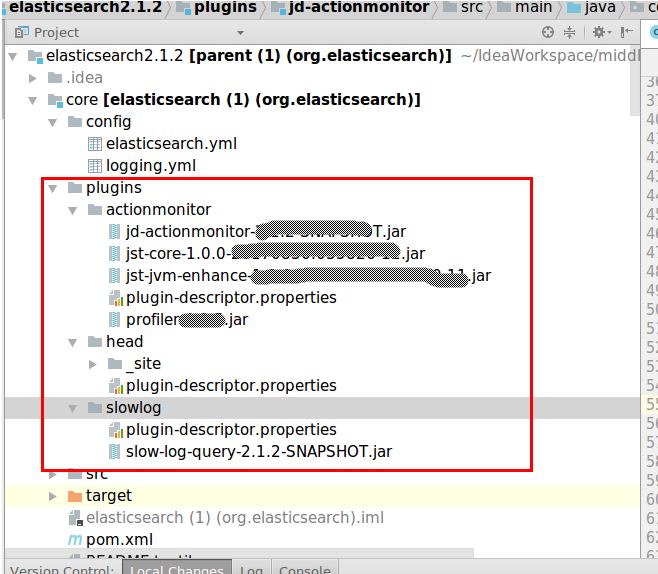
- es源码插件加载位置
2.2 es核心包插件模块结构
PluginManager类,插件管理类,负责插件的安装,卸载,下载等工作。
PluginsHelper类,插件帮助类,负责列出环境下面所有的site插件。
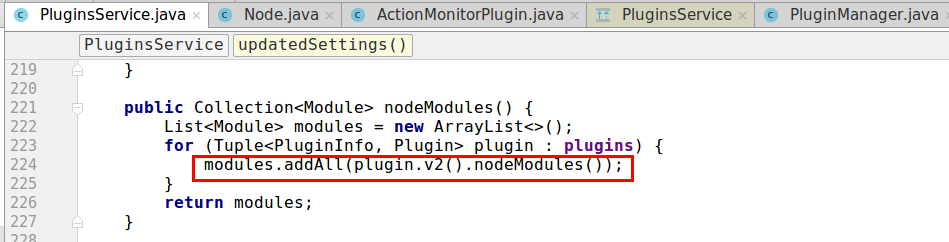
PluginsService类,插件服务类,负责插件的加载,实例化和维护插件信息。
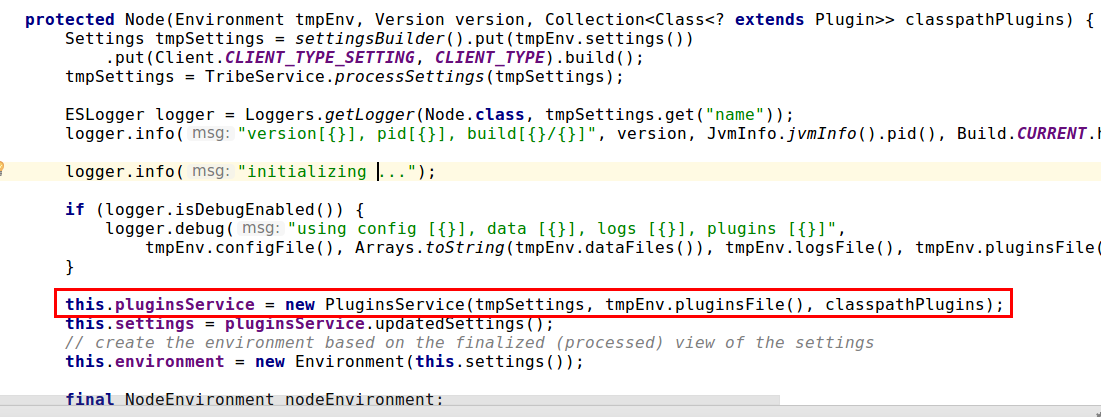
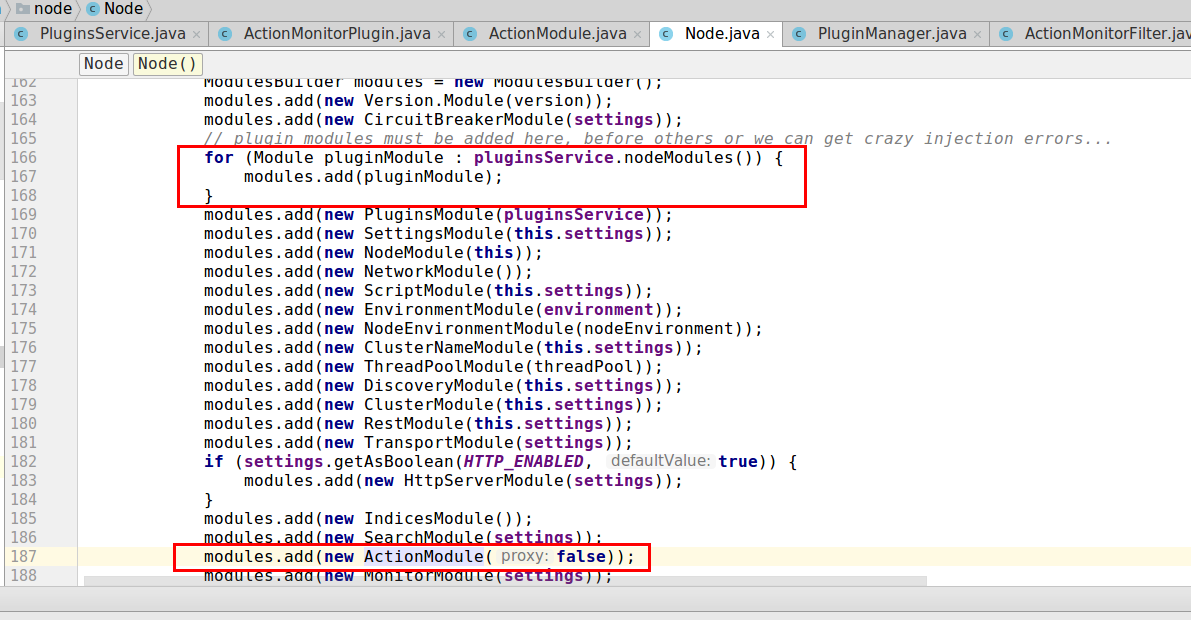
- 初始化Node的时候,首先会实例化 PluginsService 类,然后注入PluginsModule模块(将我们开发的插件加入容器)。
tmpEnv.pluginsFile()获取的地址就是{ES_HOME}/plugins
补充:附上带中文注释的
PluginsService构造过程,可以看出其功能是注册ES根目录{ES_HOME}/plugins文件夹下的所有插件。
1 | public class PluginsService extends AbstractComponent { |
2.3 开发一个Filter类型的插件。(如日志,监控等)
首先在例子中我们开发的插件名称叫
ActionMonitor,功能是做TP监控统计。(本文不讨论监控的实现),那么通过ActionFilter实现。
注意:ActionMonitor是我们自己定义的类。
- 我们首先讨论
ActionFilter是做什么的
1 | public interface ActionFilter { |
注释:
第一个apply是request的拦截方法
第二个apply是response的拦截方法
而后我们看下 ActionFilter拦截的对象 TransportAction。
1 | public abstract class TransportAction<Request extends ActionRequest, Response extends ActionResponse> extends AbstractComponent { |
注释:
code1 对所有request进行filter。(通过对加载的filter开启内部计数器的方式)
code2 执行真正的request方法。
code3 这里个人感觉就是一个异常逻辑,通常应该不会执行到。
code4 request真正执行业务的同时会注册response的回调监听,在请求完成时会触发code6
code6进而执行code5(es rpc是通过异步回调实现的。ES的RPC详情参见 [源码]Elasticsearch源码2(通信机制之RPC)))。
code5 对所有的response进行filter。同code1
然后我们再看下自定义插件类
ActionMonitorPlugin
1 | public class ActionMonitorPlugin extends Plugin { |
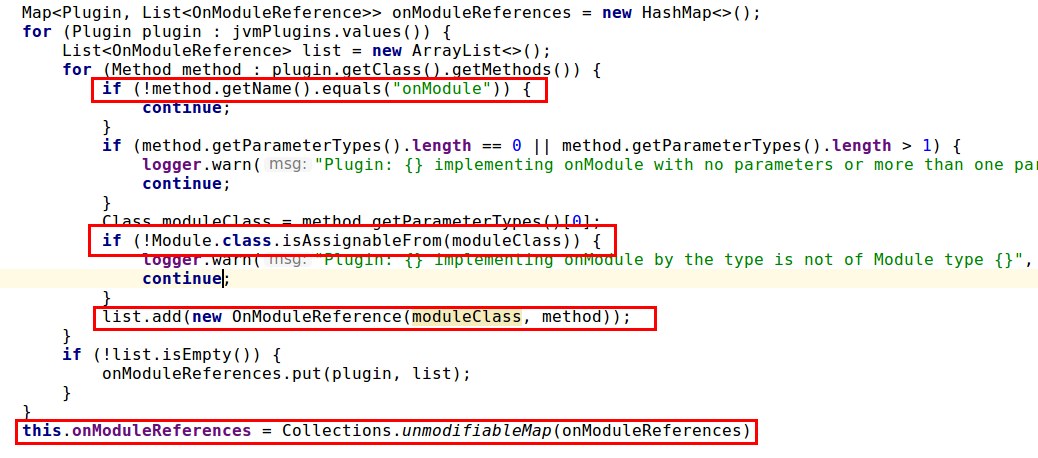
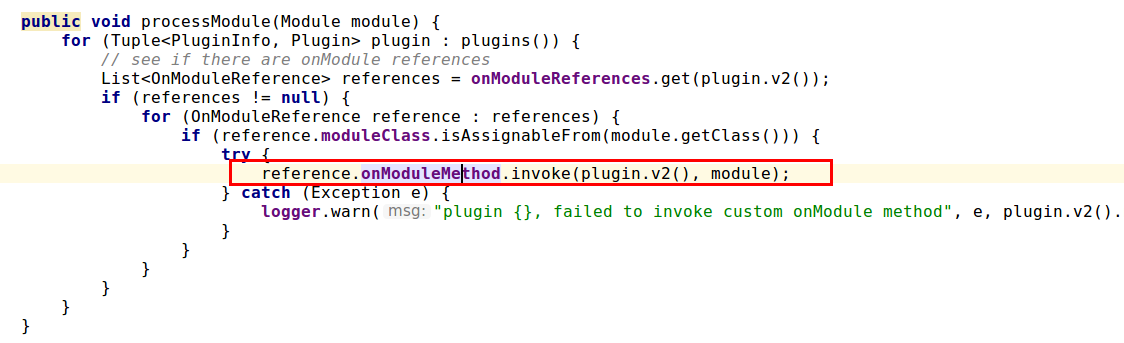
code1插件初始化的源码分析(通过PluginsService进行初始化)
以下截图为
PluginsService中如何把自定义Plugin的onModule方法引用注入容器并在相应作用域启动时加载(processModule())。
加载作用域包括Node,Index,Indices。
- 只要把Filter注册到ActionModule,ActionModule便会将在Node启动时加载到容器中,我们再回忆下Node加载的源码
- ActionModule的变量actionFilters中,就是我们此次开发的Filter集合
1 | public class ActionModule extends AbstractModule { |
注:
2.4 ES是如何扩展现有模块的?
上一节我们分析了Filter类型的插件如何初始化和如何注入容器。那么ES核心包除了ActionModule之外还有什么模块可以扩展呢?
1) 可扩展的模块,一般都提供了 addXXX,registerXXX 等方法
1 | //智能提示 |
2) 可替换的模块,一般是实现了SpawnModules接口的模块,比如DiscoveryModule
1 |
|
根据配置项
discovery.type来确定加载那个模块,不可以扩展或替换的组件,比如
Internal开头的组件,InternalClusterService,InternalIndicesService等是不可以替换的。